Angels Landing Hike in Zion: Permits, Trail Guide, and What to Expect in 2026
The Angels Landing hike is one of the most iconic and talked-about hikes in the United States. Known for its steep drop-offs, narrow ridgeline, and chain-assisted climb, it offers some of the most dramatic views in Zion National Park. It’s also a hike that demands respect, preparation, and an honest look at your comfort with heights. In recent years, Angels Landing has changed. Due to extreme crowding and safety concerns, a permit system is now required for the final chain section to the summit. That system will still be in place for 2026, and understanding how it works is just as important as knowing what the trail itself is like. This guide focuses exclusively on the Angels Landing hike. We cover the trail step by step, explain the permit process in detail, and share what to realistically expect on the route. The goal is simple: help you decide if Angels Landing is right for you and prepare you properly if it is.
This article may contain affiliate / compensated links. For full information, please see our disclaimer here.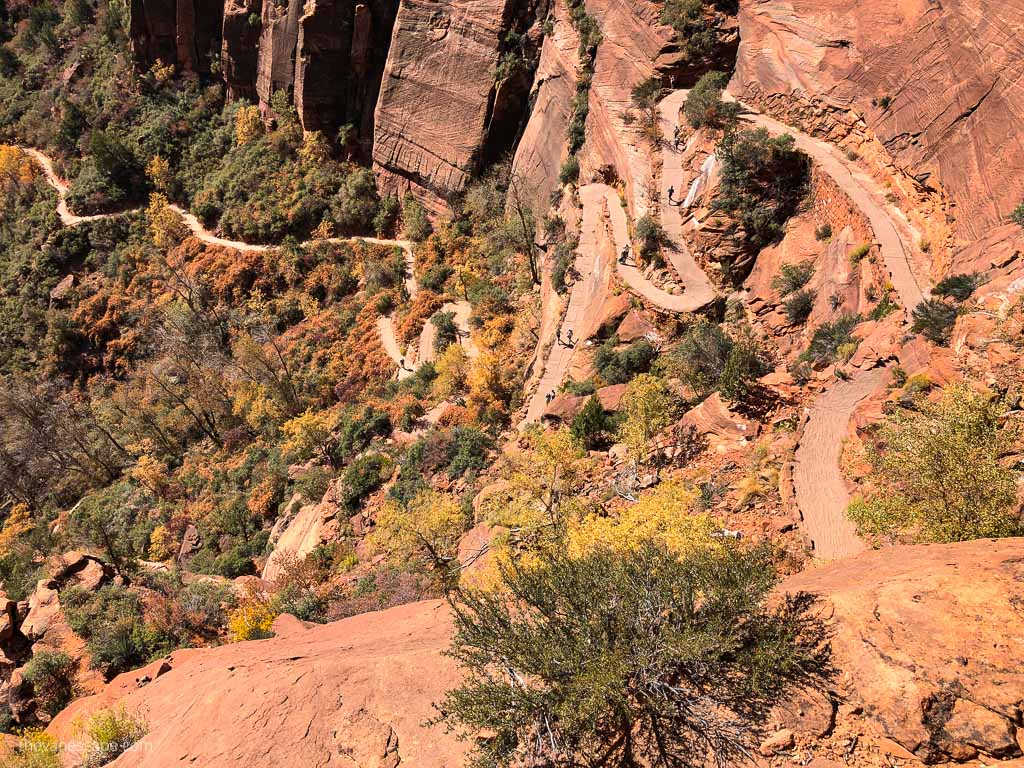
Our Experience Hiking Angels Landing
Chris and I hiked Angels Landing during one of our Utah national parks road trips, before the permit system was introduced. Even then, it was clear why this trail needed changes. Crowds, narrow sections, and exposure made parts of the hike feel intense, especially near the chains.
What stayed with us most was not just the view from the top, but the entire climb. The steady ascent, the switchbacks of Walter’s Wiggles, and the moment you reach Scout Lookout all build anticipation. Standing there, looking at the final ridge, you clearly understand that this hike is as much mental as it is physical.
Among the top things to do in Zion, hiking Angels Landing remains one of the most sought-after experiences for visitors.
Angels Landing is unforgettable, but it’s not a hike we’d recommend blindly. We’ve done many hiking trails in Zion National Park, and this one stands out for its exposure and consequences if you’re not fully comfortable with heights. That’s exactly why this guide goes beyond photos and hype and focuses on what the hike is really like, step by step.
Angels Landing Trail Overview
The Angels Landing hike is short in distance but big in elevation and exposure. Most of the route follows a well-built trail, but the final section is narrow, steep, and requires the use of chains.
- Location: Zion National Park
- Trailhead: The Grotto (Shuttle Stop #6)
- Round-trip distance: 5.4 miles (8.7 km)
- Elevation gain: about 1,488 feet (453 m)
- Average time: 4–5 hours
- Difficulty: strenuous (YDS Class 3 on the chains section)
- Permit required: Yes, for the final chain section beyond Scout Lookout
The hike begins on the West Rim Trail and climbs steadily through Zion Canyon. The first part is physically demanding but not exposed. The character of the hike changes completely at Scout Lookout, where the chain-assisted section begins. This final half mile is where permits are required and where the trail becomes narrow, exposed, and mentally challenging.
Even without a permit, hikers can still reach Scout Lookout and enjoy expansive views into Zion Canyon. Continuing beyond that point to the summit of Angels Landing is optional and should only be attempted if you feel confident with heights, footing, and crowd conditions.

Angels Landing Permit System (2026 Update)
Due to heavy crowds and safety concerns, a permit is required to hike the final section of Angels Landing. This system will remain in place for 2026 and applies to all hikers who want to continue beyond Scout Lookout and use the chains to reach the summit.
Why Permits Are Required
Some hikes in Zion require permits for safety reasons due to crowds, exposure, and changing conditions. The most in-demand permits are for Angels Landing, the Subway, and the Narrows.
Angels Landing is one of the most popular hikes in Zion National Park, but the final ridge is narrow and highly exposed. In the past, overcrowding led to long lines, unsafe passing, and fatal accidents. The permit system limits the number of hikers on the chains section at any given time and improves overall safety.
Where the Permit Is Required
- A permit is required only for the chain-assisted section from Scout Lookout to the summit.
- No permit is needed to hike up to Scout Lookout itself.
- Rangers regularly check permits at the start of the chains section.
Types of Angels Landing Lotteries
There are two ways to get a permit, both handled through Recreation.gov:
- Seasonal Lottery. This option allows you to apply in advance for a specific hiking window. It’s the best choice if Angels Landing is a priority for your trip.
- Day-Before Lottery. This option opens the day before your planned hike and works well for flexible itineraries or last-minute plans.
Permit Fees
- $6 non-refundable application fee (per group, up to 6 people)
- $3 per person permit fee if selected

Time Windows
When applying, you must choose one of three entry times:
- Before 9:00 a.m.
- Between 9:00 a.m. and 12:00 p.m.
- After 12:00 p.m.
These windows help spread hikers out across the day and reduce congestion on the chains.
What If You Don’t Get a Permit?
If you’re not selected, you can still hike to Scout Lookout and enjoy sweeping canyon views. Several other rewarding hikes in Zion offer similar scenery without permits, and many visitors find Scout Lookout to be a satisfying turnaround point.
Understanding the permit system is essential when planning an Angels Landing hike. It affects timing, expectations, and how your day in Zion will unfold.

Step-by-Step Trail Description: What to Expect on Angels Landing
The hike to Angels Landing is a steady progression from a well-built canyon trail to one of the most exposed routes in Zion National Park. Knowing what comes next helps you pace yourself and decide where to turn around.
1. The Grotto Trailhead → West Rim Trail
The hike starts at The Grotto (Shuttle Stop #6). After crossing the Virgin River, the trail joins the West Rim Trail and begins climbing right away. This section is wide, well maintained, and steadily uphill. Expect crowds early in the morning.
2. Refrigerator Canyon
About 1.3 miles in, the trail enters Refrigerator Canyon. This shaded, narrow canyon offers a brief break from the sun and heat. Temperatures here can feel noticeably cooler, even on warm days.
3. Walter’s Wiggles
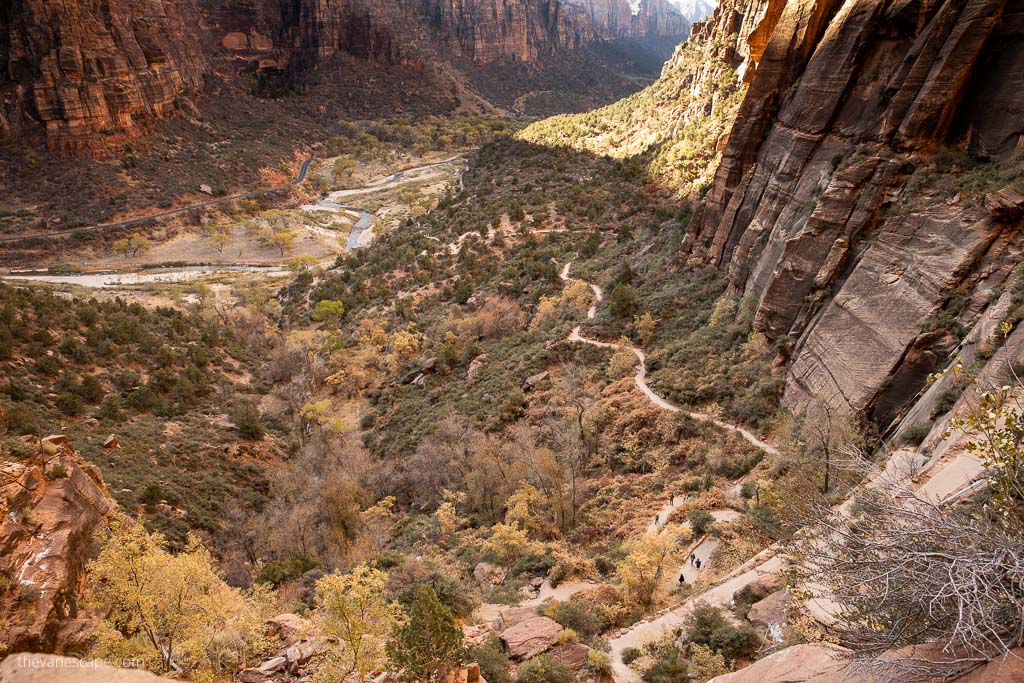
Next comes Walter’s Wiggles, a series of 21 tight switchbacks built in the 1930s. This is one of the most physically demanding parts of the hike. The grade is steep but the trail is solid and engineered well. Take breaks and don’t rush this section.

4. Scout Lookout (Decision Point)
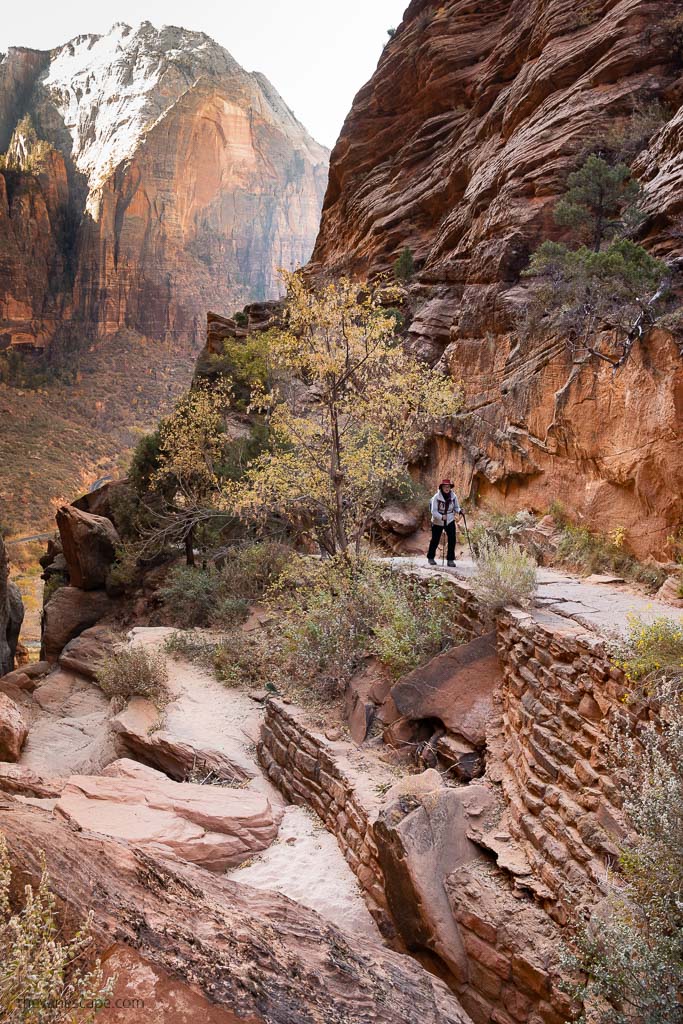
At roughly 2.1 miles from the trailhead, you reach Scout Lookout. This wide platform offers expansive views into Zion Canyon and is where many hikers stop.
This is the last safe and comfortable turnaround point.
Take time here to rest, eat, and honestly assess your comfort with exposure.
No permit is required to reach Scout Lookout.

5. The Chains Section (Permit Required)
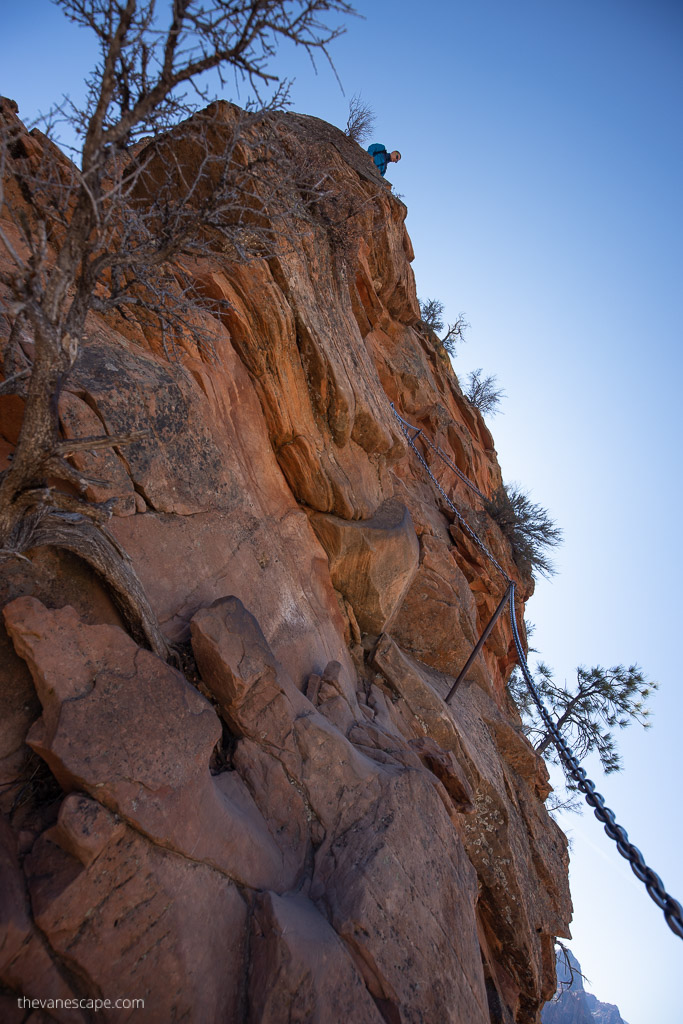
Beyond Scout Lookout, the character of the hike changes completely. The trail narrows, drop-offs appear on both sides, and chains are bolted into the rock to assist with climbing. This half-mile section is steep, exposed, and mentally demanding. Passing other hikers requires patience and awareness.
6. The Summit of Angels Landing
At the top, the trail opens onto a small summit area with 360-degree views over Zion Canyon. The Virgin River winds far below, and the scale of the park becomes very clear. Space is limited, so be mindful of others and your footing.


7. The Descent
Going down is often harder than going up. The rock can be slick, and fatigue sets in. Take your time, use the chains, and let uphill hikers pass when appropriate. Once back at Scout Lookout, the remainder of the hike feels much more relaxed.
Understanding each section of the trail helps set expectations and makes the Angels Landing hike safer and more enjoyable.
How Exposed Is Angels Landing Really?
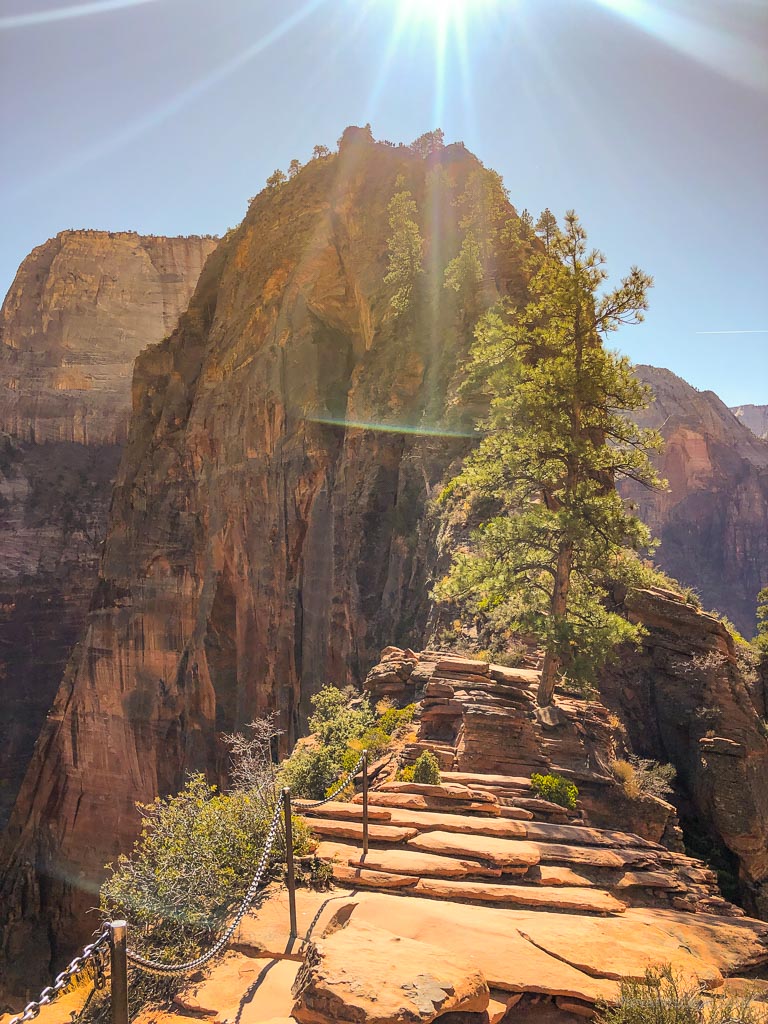
Exposure is what defines the Angels Landing hike. The final section follows a narrow sandstone ridge with steep drop-offs on both sides, often hundreds of feet down. In several places, the trail narrows to just a few feet wide, and your footing matters with every step.
Chains are bolted into the rock to help with balance and stability, but they don’t eliminate the exposure. You still need to feel comfortable moving carefully, using your hands, and waiting for others to pass in tight spots. On busy days, patience is essential, as hikers move at very different speeds.
If you have a strong fear of heights, Angels Landing can feel overwhelming. Many hikers turn around at Scout Lookout—and that’s a smart decision if exposure makes you uneasy. This hike rewards confidence, calm movement, and respect for conditions. If any of those feel off, turning back is the right call.
Is Angels Landing Worth It?
Whether Angels Landing is worth it depends on you, not the hype. This hike delivers incredible views and a true sense of accomplishment, but it also comes with real exposure and consequences if you’re uncomfortable on narrow terrain.
Angels Landing is a great choice if you:
- Feel comfortable with heights and exposure
- Have hiking experience on steep, uneven terrain
- Are willing to move slowly and patiently around other hikers
- Understand that turning back is always an option
It may not be the right hike if you:
- Have a strong fear of heights
- Feel anxious on narrow ledges or near drop-offs
- Are hiking with small children
- Don’t feel confident using chains for balance
Many hikers find that reaching Scout Lookout alone is already a rewarding experience, with wide views and far less stress. The summit adds intensity and drama, but it’s not required to have a memorable hike in Zion National Park.
Angels Landing is worth it when it matches your comfort level, fitness, and mindset on the day of your hike.
If you want to connect this hike with other highlights, our Utah road trip guide will help you build a logical route.

Best Time to Hike Angels Landing
Timing makes a big difference on Angels Landing. Weather, crowds, and light all affect how the hike feels and how safe it is.
- Best seasons: Spring and fall usually offer the most comfortable conditions. Temperatures are cooler, daylight is good, and the trail is less slippery than in winter or after summer storms.
- Summer considerations: Summer brings heat and crowds. Start early, carry extra water, and avoid the chains section during midday heat. Afternoon monsoon storms can arrive quickly, so always check the forecast before hiking.
- Winter considerations: Winter conditions can include ice and snow, especially near the chains. Traction devices may be necessary, and the hike can be dangerous if the rock is icy. Check trail status and current conditions before committing.
- Best time of day: Early morning is the safest and least crowded option. Light is softer, temperatures are lower, and you’ll have more space on the chains. Late afternoon can be beautiful for light, but make sure you allow enough time to descend before dark.
Choosing the right season and start time helps make Angels Landing a safer and more enjoyable experience in Zion National Park.
Safety Tips Specific to Angels Landing
Angels Landing demands more attention than a typical trail. These tips focus on the sections where most issues happen and can make a real difference on the hike.
- Use the chains correctly. Keep one hand on the chain at all times in exposed sections and move one step at a time. Don’t rush.
- Yield to uphill hikers. This helps keep movement predictable and reduces risky passing on narrow sections.
- Wear gloves for the chains. They improve grip and protect your hands, especially when the metal is hot or cold.
- Avoid the chains when rock is wet or icy. Rain, snow, or ice make the sandstone extremely slippery and increase fall risk.
- Take breaks at Scout Lookout. This is the best place to reassess energy, weather, and comfort before committing to the final section.
- Turn around if needed. Fear, fatigue, or changing conditions are valid reasons to stop. The views from Scout Lookout are already impressive.
Safety on Angels Landing comes from patience, awareness, and honest self-assessment. Respect the exposure, move deliberately, and make decisions that prioritize getting back down safely.
What to Pack for the Angels Landing Hike
Packing correctly for Angels Landing matters more than on most Zion hikes. The trail is exposed, steep, and unforgiving if conditions change.
- Hiking shoes with excellent traction
This is non-negotiable. Smooth or worn soles increase slip risk, especially on sandstone. - Light gloves
Gloves protect your hands and improve grip on the chains. They’re helpful in both hot and cold conditions. - Plenty of water
Bring more than you think you’ll need, especially in warmer months. There is no water on the trail. - Salty snacks or electrolytes
The climb is strenuous. Balance hydration with food to avoid fatigue. - Sun protection
Hat, sunglasses, and sunscreen are essential. Much of the trail is exposed. - Light layers
Temperatures can change quickly, especially in Refrigerator Canyon or during shoulder seasons. - Small backpack
Keep it compact so it doesn’t throw off your balance in narrow sections.
Avoid trekking poles on the chains section. They get in the way and can make passing other hikers unsafe. Secure everything in your pack so nothing dangles or catches on the chains.

Photography Tips for Angels Landing
Angels Landing is one of the most photogenic spots in Zion National Park, but it’s also a place where safety comes first. Plan your shots carefully and keep your focus on footing and surroundings.
- Best light: Early morning and late afternoon provide the best contrast and depth in Zion Canyon. Midday light is harsh and flattens the scene.
- Lens choice: A wide-angle lens works best for capturing the scale of the canyon and the narrow ridgeline. Standard zooms also work well for details and layered canyon views.
- Be crowd-aware: Space is limited on the summit and along the chains. Avoid setting up shots where others need to pass.
- Skip the tripod: The trail is narrow and exposed. Tripods create obstacles and aren’t practical or safe here.
- Secure your gear: Use straps and keep cameras firmly attached. Dropping gear can be dangerous for hikers below.
If you’re hiking near sunset, remember that you must descend before it gets dark. The climb down requires full attention, and low light increases risk. On Angels Landing, getting back down safely always matters more than any photo.
Final Thoughts
Angels Landing is one of those hikes that stays with you long after you leave Zion. It’s dramatic, exposed, and demanding, but also incredibly rewarding when done with the right mindset and preparation.
The permit system has changed how the hike works, but it has also made the experience safer and more controlled.
This is not a trail to rush or take lightly. Knowing what to expect, understanding the permit process, and being honest about your comfort with heights all matter more here than on most hikes. If Angels Landing feels right for you, it can be an unforgettable highlight of Zion National Park. And if it doesn’t, Scout Lookout and many other trails still offer incredible views without the risk.
Do You Like It? Pin It For Later!