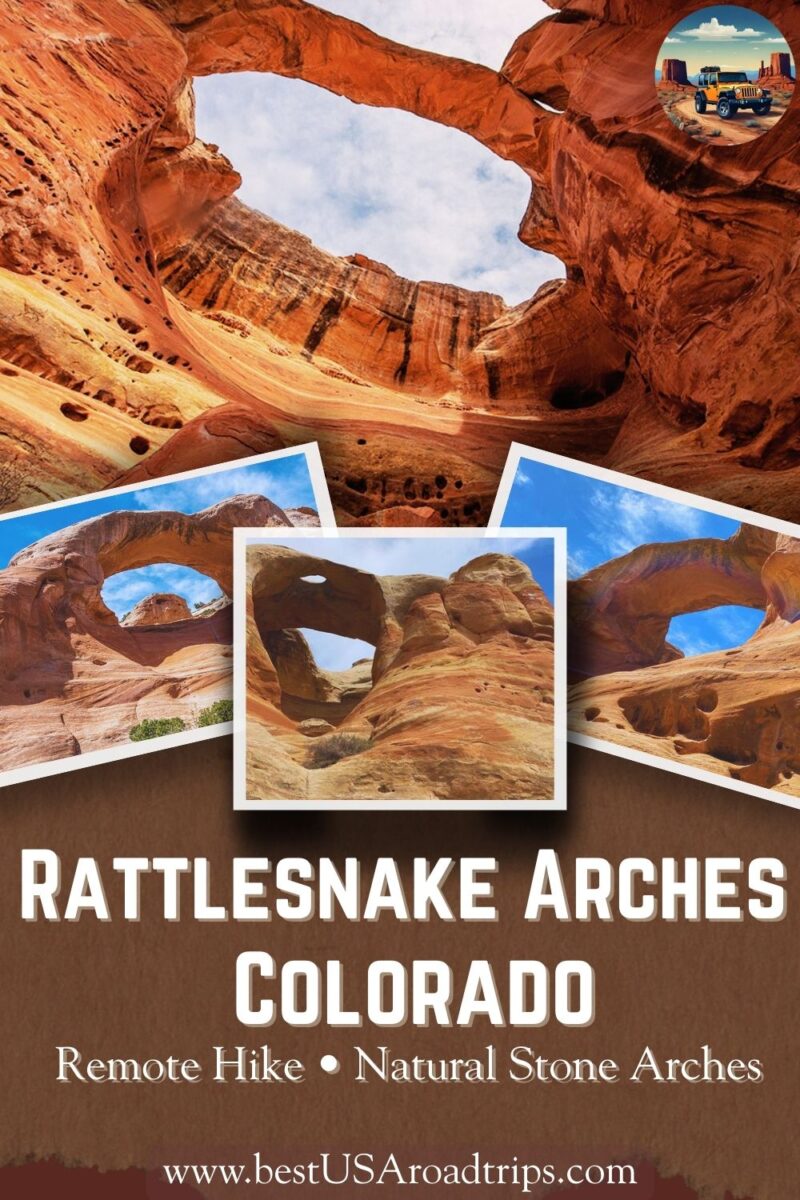
Ultimate Guide to Hiking Rattlesnake Arches: Colorado’s Hidden Arch Wilderness
Hidden deep within the canyons west of Grand Junction lies one of Colorado’s best-kept secrets. Rattlesnake Arches is wild, remote, and absolutely breathtaking — a place where wind and time have carved sandstone into graceful arches that rival those in Utah’s famous parks. Few hikers make the journey here, and that’s part of the magic. The dirt roads are rugged, the trail is long, and the desert sun can be relentless. But once you stand beneath these soaring arches, the effort feels entirely worth it. This is not just another scenic stop — it’s an adventure. In this guide, you’ll find everything you need to plan your own self-guided trip to Rattlesnake Arches: how to get there, when to go, what to expect on the trail, and essential safety tips for navigating this remote wilderness.
This article may contain affiliate / compensated links. For full information, please see our disclaimer here.
Why Hike Rattlesnake Arches in Colorado? Our Experiences
We discovered Rattlesnake Arches during our two-week Colorado road trip, and it instantly became one of our favorite adventures. Tucked deep within the Black Ridge Canyons Wilderness, just beyond Colorado National Monument, this remote corner of western Colorado feels wild, silent, and untouched.
The area is home to the second-largest concentration of natural arches in the United States, right after Arches National Park in Utah. Yet few people make it here, which makes the experience even more rewarding. The road is rough, the hike is demanding, and the heat can be intense—but the payoff is extraordinary.
Chris and I spent an entire day exploring this canyon. We hiked between towering sandstone cliffs, stood beneath the massive Cedar Tree (Rainbow) Arch, and watched the light change across the desert walls. Each arch seemed to have its own character and color, shaped by centuries of wind, water, and time.
It’s not an easy hike, but that’s exactly why we loved it. The solitude, the scale of the landscape, and the sense of discovery made Rattlesnake Arches one of the most memorable stops on our Colorado travels. If you enjoy off-the-beaten-path trails, this wild desert hike belongs on your itinerary.


What and Where Is Rattlesnake Canyon & the Arches?
Rattlesnake Canyon lies in the far western corner of Colorado, near Grand Junction and Fruita, just beyond Colorado National Monument.
It’s part of the McInnis Canyons National Conservation Area, which covers over 120,000 acres of red rock canyons, mesas, and desert wilderness managed by the Bureau of Land Management. Within it sits the Black Ridge Canyons Wilderness, a rugged 75,000-acre area that protects one of the most remote and scenic landscapes in the state.
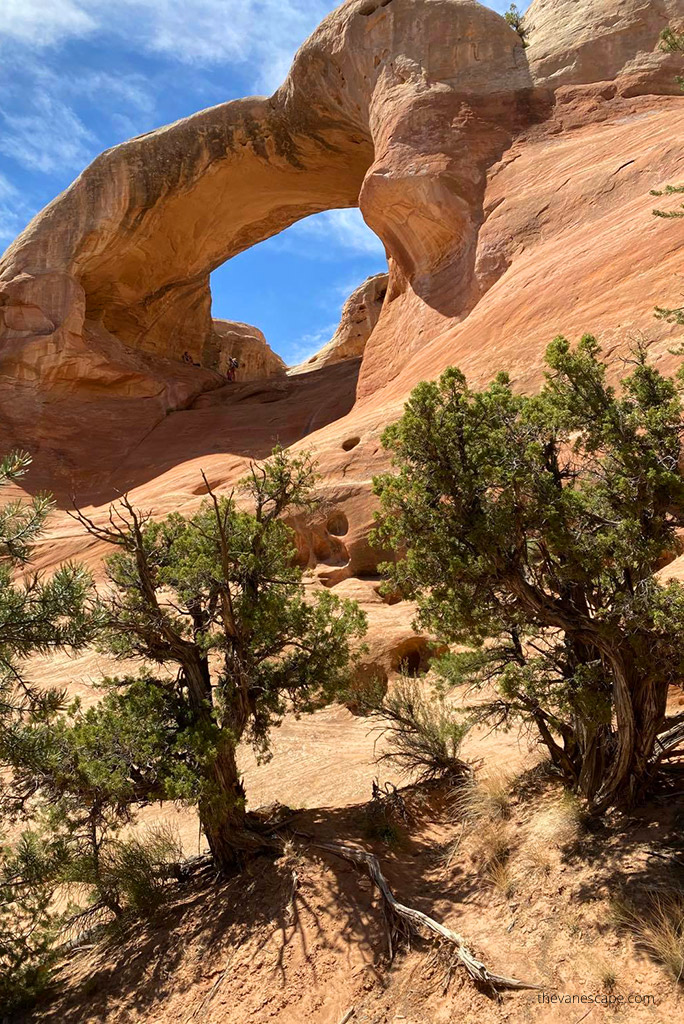
What makes this place truly special is its geology. Rattlesnake Canyon contains the second-largest concentration of natural arches in the United States—a stunning collection of sandstone spans carved from the Entrada and Wingate formations over millions of years. Erosion, wind, and water have shaped this desert into a maze of cliffs, alcoves, and towers.
There are nine known arches in the canyon, though hikers typically see seven of them on the trail. The most striking include:
- Cedar Tree Arch (also called Rainbow Arch), with a span of 76 feet and a height of 43 feet.
- East Rim Arch (also known as Akiti or Centennial Arch), soaring 120 feet high with a 40-foot opening.
- Bridge Arch, or Hole-in-the-Bridge, with a graceful 40-foot span.

Between these formations, the canyon’s rim offers vast desert views stretching toward Utah. The landscape is dotted with piñon, juniper, and sagebrush, while mule deer, bighorn sheep, and golden eagles often appear in the distance.
Rattlesnake Canyon may sit just a few miles from civilization, but once you’re out there, it feels worlds away. It’s one of those rare places where Colorado’s wild desert still looks—and sounds—exactly as it must have centuries ago.

Best Time to Visit – Seasons, Weather & Road Access
Timing is everything when planning a hike to Rattlesnake Arches. This remote desert area can be brutally hot in summer and nearly inaccessible in winter, so choosing the right season makes all the difference.
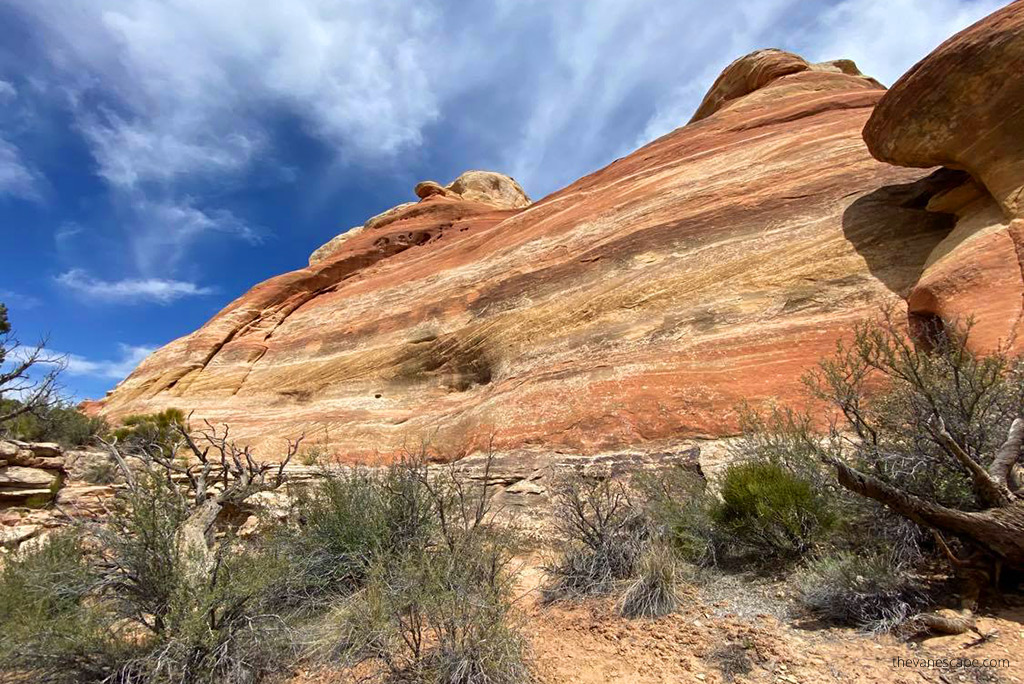
The best time to visit is spring (April–May) or fall (September–October), when daytime temperatures are mild, skies are clear, and the desert colors are at their best. In summer, the exposed slickrock heats up quickly, and temperatures can soar above 100°F (38°C). If you visit between June and August, start your hike at sunrise and bring far more water than you think you’ll need.
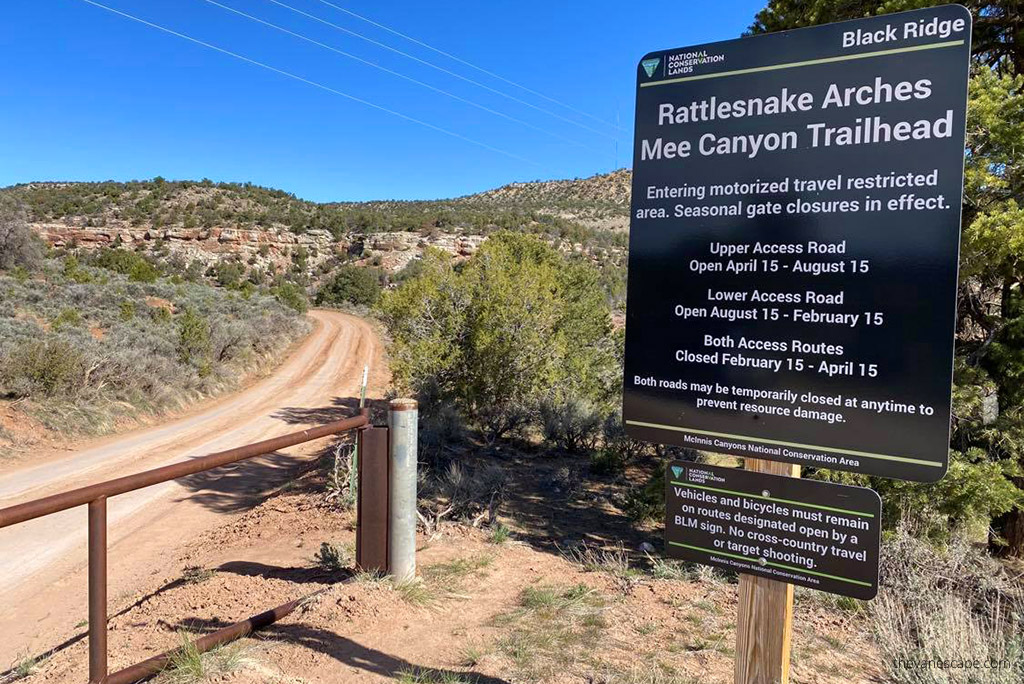
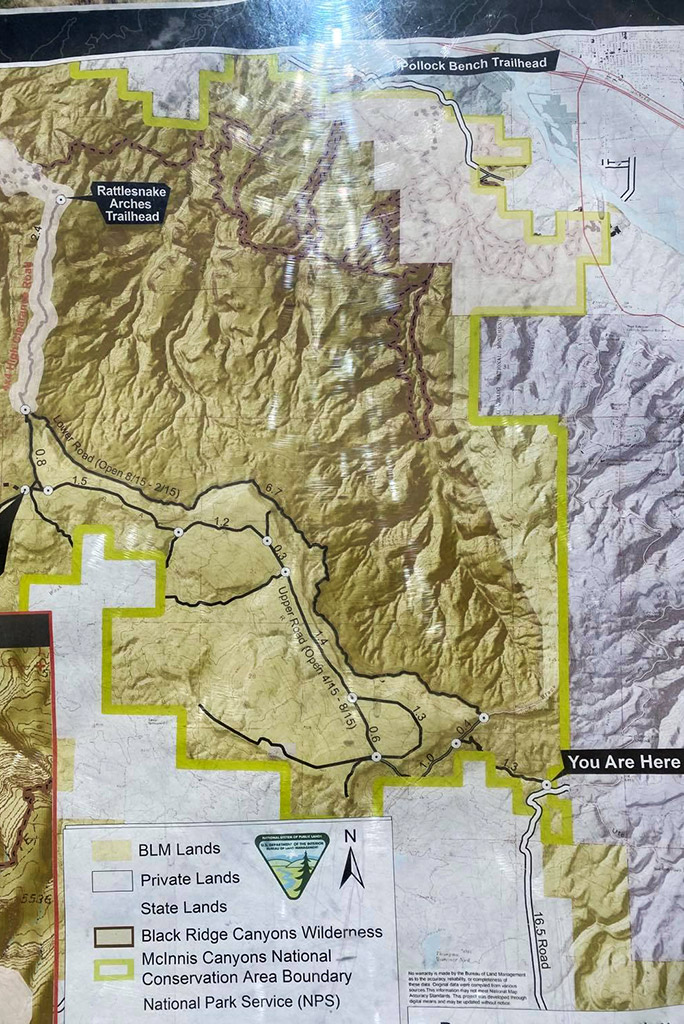
Winter can bring snow or ice, especially along the rim and on the access roads. Some routes are closed seasonally to protect the terrain. Both Upper and Lower Black Ridge Access Roads—the main 4WD routes to the Rattlesnake Arches Trailhead—are open on a rotating schedule:
- Upper Road: open April 15 – August 15
- Lower Road: open August 15 – February 15
From February 15 – April 15, both roads are closed to motorized travel. During those weeks, you can still hike in from the Pollock Bench Trailhead, but it’s a much longer trek.
No matter the season, always check the weather forecast and road conditions before you go. The clay and sandstone surfaces become extremely slick after rain, and a short storm can make the access road impassable. The best source for current updates is the BLM Grand Junction Field Office (2815 H Road, Grand Junction; phone: 970-244-3000).
If you plan your visit right, Rattlesnake Canyon offers one of the most rewarding and secluded hikes in western Colorado—an adventure best enjoyed under clear skies and cooler temperatures.


Access Routes to Rattlesnake Arches: Two Main Ways
There are two routes to reach Rattlesnake Arches, and both promise adventure. Your choice depends on what kind of experience you want—and what kind of vehicle you have.
Whichever route you choose, reaching Rattlesnake Arches is part of the adventure. The remoteness is what makes it so special—you’ll earn every arch you see.
Option 1: Hike from Pollock Bench Trailhead (No 4WD Required)
This is the longer but easier-to-access option. The Pollock Bench Trailhead lies just north of Fruita, off a well-graded dirt road along the Colorado River. You won’t need a four-wheel-drive vehicle to get here, which makes it a great choice for most travelers.
From the trailhead, the hike to Rattlesnake Arches is about 14 miles round trip and rated moderate to strenuous. The trail climbs steadily through slickrock benches and desert washes before reaching the rim of Rattlesnake Canyon. It’s a demanding full-day adventure, best suited for experienced hikers prepared for heat, distance, and limited shade.
Chris and I took this route on our first visit, starting early in the morning with full hydration packs and plenty of snacks. The trail is wild and quiet—you might not see another person for hours. When you finally reach the canyon rim and spot the first arch through the red cliffs, it’s pure magic.
Directions: From Grand Junction, take I-70 west to Exit 19 (Fruita). Drive south toward Kingsview Estates, turn right, and continue through the subdivision until the pavement ends. Follow the gravel road past Devils Canyon Trailhead for about 3.5 miles to reach the Pollock Bench parking area. Parking is free, and no permit is required.

Option 2: Drive the Black Ridge Access Road (4WD or High Clearance Required)
If you prefer a shorter hike but a tougher drive, take the Black Ridge Access Road. This 13-mile dirt route starts just beyond Colorado National Monument and leads to the upper Rattlesnake Arches Trailhead. You’ll cut the hike to about 6 miles round trip, but the road itself is an adventure.
A high-clearance four-wheel-drive vehicle is mandatory, and so is off-road driving experience. Expect loose rock, deep sand, steep grades, and narrow turns along cliff edges. When wet, the road becomes completely impassable.
Chris and I had a capable 4WD rental, but after scouting the final two miles—an obstacle course of rock ledges—we decided to park safely and hike the rest on foot. It added distance, but the peace of mind was worth it.
If you take this route, allow at least 1–2 hours to cover the 13 miles. Carry extra water and a spare tire, and always check road conditions in advance.
Directions to Rattlesnake Arches Trailhead via Black Ridge Access Road (4WD)
This route gives you the shorter hike—but the drive is serious. Only go dry. Only go with high-clearance 4WD and real off-road experience.
Seasonal openings (very important):
- Upper Black Ridge Road: open April 15 – August 15.
- Lower Black Ridge Road: open August 15 – February 15.
- Both roads are closed to motorized travel Feb 15 – Apr 15. Hike-in from Pollock Bench if visiting then.
Approach from Grand Junction / Fruita:
- Take I-70 to Exit 19 (Fruita).
- Enter Colorado National Monument and drive Rim Rock Drive toward Glade Park.
- At 16.5 Road, turn right. In 0.2 miles, turn right again onto Black Ridge Access Road. Follow signs for Upper or Lower (whichever is open). Both meet and continue to the same area. Allow time to stop at the kiosk/map.


Road reality check
- Total distance on Black Ridge to the arches area is about 13 miles from the Monument side. Plan 1–2 hours one way.
- The last ~1.5 miles are the crux: steep grades, ledges, loose rock, and tight turns along exposure. High-clearance 4×4 required here; many drivers park earlier and walk the final stretch.
- Impassable when wet. The clay turns to grease; do not attempt after rain or snow. Check conditions first with BLM Grand Junction Field Office.

Pro tips from our drive:
- Start at sunrise. You’ll want cooler temps and time buffer.
- Air down only if you know how and have a compressor.
- Carry extra water, a full-size spare, jack, and recovery basics.
- If the final section looks beyond your comfort level, park at a safe pullout and hike the rest. We’ve done that. Worth it for peace of mind.
Quick safety notes:
- No services. No reliable cell signal. Tell someone your plan.
- Stay on the designated route; this is a sensitive desert environment within McInnis Canyons NCA / Black Ridge Canyons Wilderness.
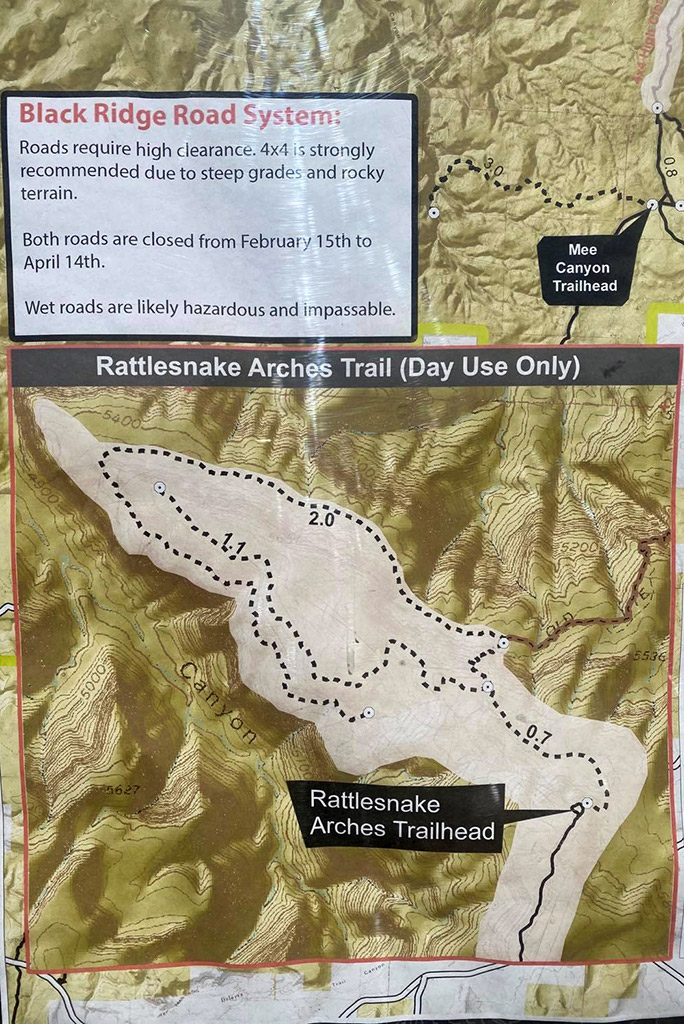
Trail Overview – Lower vs Upper Arches Loop
Once you reach the Rattlesnake Arches Trailhead—whether by the long Pollock Bench hike or the rough Black Ridge Access Road—you’ll find that the Rattlesnake Arches Trail is divided into two distinct sections: the Lower Arches Trail and the Upper Arches Trail.
It’s important to know that this is not a full loop. Each section offers a different perspective of the canyon, and together they reveal the full beauty of the arches.


The Lower Arches Trail – The Main Route
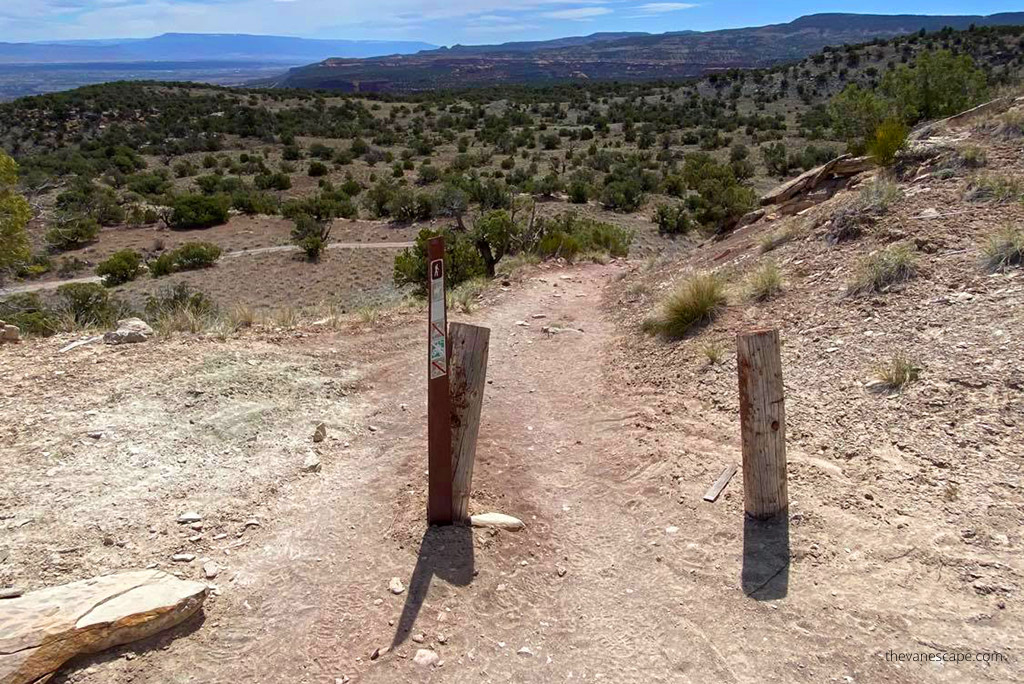
If you want to see all seven of the main arches, this is the route to take. From the parking area, walk about 0.5 miles to a trail junction marked by a post. The path to the right drops steeply into the canyon—that’s the Lower Arches Trail.
The descent is short (about 0.2 miles) but steep and rocky, so take your time. Once you reach the canyon floor, the trail levels out and continues for roughly 2.2 miles one way, winding beneath towering sandstone walls.
At the far end, the trail ends beneath the massive Cedar Tree (Rainbow) Arch, one of the largest and most photogenic formations in the canyon. A sign marks the end of the official trail here. Do not attempt to climb the arch or scramble the slick wall above it—it’s both dangerous and harmful to the delicate sandstone.
This section is strenuous, especially under the desert sun, but it’s also the most rewarding. Standing at the base of Rainbow Arch, surrounded by glowing red cliffs, felt like stepping into another world.
Upper Arches Trail – Easy Rim Walk
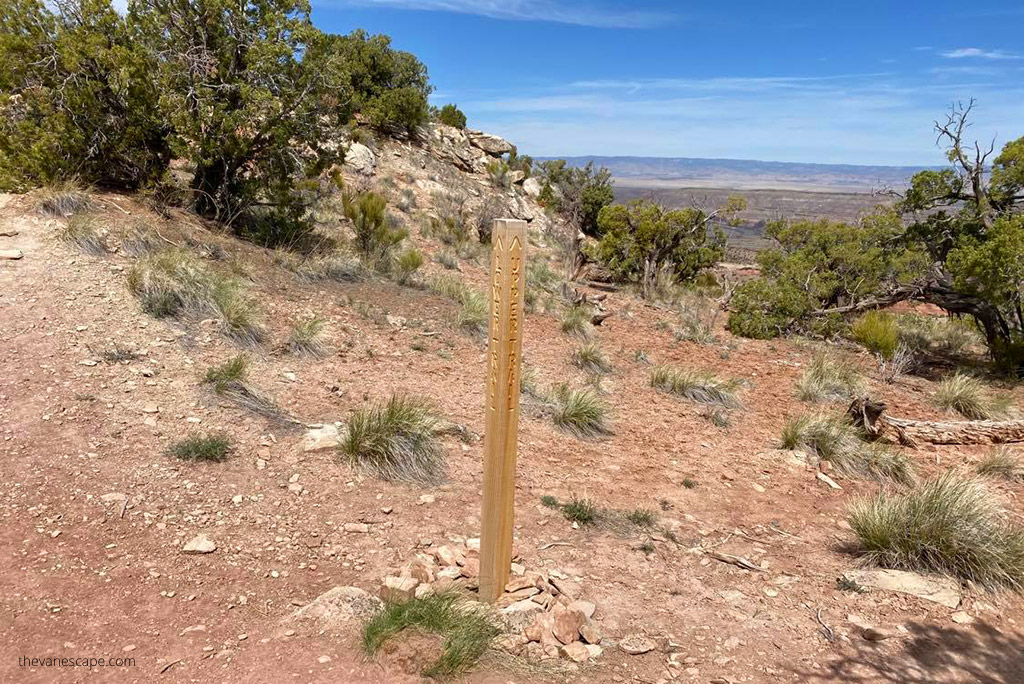
From the same junction near the parking area, the Upper Arches Trail branches to the left. This route stays on top of the rim and leads to the top of Cedar Tree Arch, offering a bird’s-eye view over the canyon and the surrounding mesas. It’s a short and easy 0.5-mile one-way walk, perfect if you’re short on time or looking for a less demanding hike.
The views from above are wide and dramatic, especially in the late afternoon when the sunlight washes over the canyon walls. However, only a couple of arches are visible from this higher vantage point, and you’ll miss the up-close experience that makes the Lower Trail so special.

Which Route to Choose
If you have the time and energy, start with the Lower Arches Trail while you’re fresh. It’s more challenging but lets you see the arches from below, where their size and detail are most impressive. Then, if time allows, finish with the easy rim walk on the Upper Trail to enjoy the views from above.
Both sections are worth exploring, but together they offer a complete experience—two unique perspectives on one of Colorado’s most extraordinary landscapes.


What to See: Arch Highlights & Scenic Features
Rattlesnake Canyon may not be well known, but it’s home to some of the most stunning natural arches in the American West. The hike takes you through a rugged red-rock landscape shaped by erosion, with soaring cliffs, alcoves, and narrow ledges framing each view. Most hikers see seven arches along the trail, although nine are officially recorded within the canyon system.
The arches vary in size, color, and character—each one sculpted by wind, water, and time. Here are the highlights to watch for along the way:

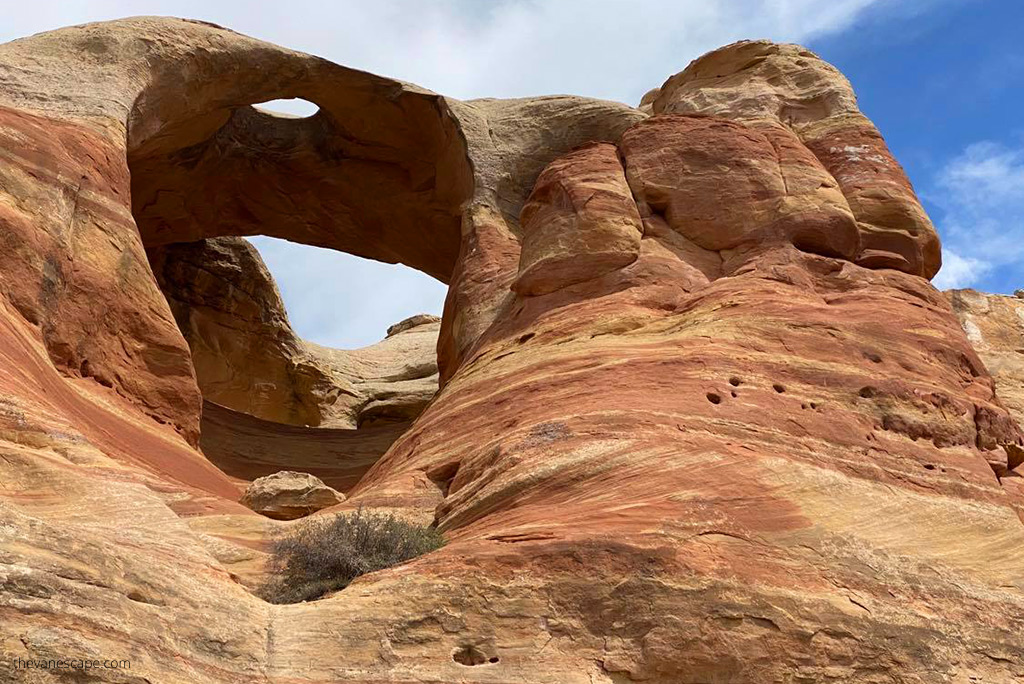
Cedar Tree Arch (Rainbow Arch)
This is the star of the hike and one of the largest natural arches in Colorado. With a 76-foot span and a 43-foot opening, it’s also known as Rainbow Arch for the graceful curve that stretches across the canyon.
A twisted juniper tree once grew in the middle, giving it the “Cedar Tree” nickname. The arch glows brilliant orange in the late afternoon light—an unforgettable sight if you time your hike right.
East Rim Arch (Akiti or Centennial Arch)
The most dramatic of the arches, East Rim Arch soars 120 feet high with a 40-foot span. You’ll find it near the far end of the Lower Arches Trail, and it’s often photographed with the canyon stretching endlessly behind it. Its tall, slender shape makes it one of the most photogenic formations in the area.
Bridge Arch (Hole-in-the-Bridge Arch)
Smaller but beautifully shaped, Bridge Arch has a 40-foot span and a 30-foot opening. Its narrow bridge-like top gives it its name. You’ll encounter it midway through the Lower Trail, tucked against a smooth sandstone wall that glows pink and gold in the morning sun.
Other Geologic Features
Beyond the named arches, keep your eyes open for windows, alcoves, and thin spires rising from the canyon floor. The sandstone cliffs are streaked with a natural desert patina—iron and manganese oxides that paint the rocks with red, brown, and black tones. Between the canyons, the mesas are covered in piñon, juniper, and sagebrush.
This harsh but beautiful environment supports a surprising amount of life. You might spot mule deer, bighorn sheep, golden eagles, or even the tracks of a mountain lion. Smaller residents—like lizards and desert songbirds—add flashes of movement and color among the rocks.
Take your time along the trail—this is a place to move slowly, notice details, and let the silence of the canyon surround you. Every turn reveals another natural masterpiece, and each arch seems to tell its own story carved in stone.

Desert Hiking Safety Tips for Visiting Rattlesnake Arches
Rattlesnake Canyon is one of Colorado’s most beautiful desert hikes—but also one of its most remote. Once you leave the trailhead, there are no water sources, no shade shelters, and no cell service. Preparation is everything here.
Chris and I spent an entire day on the trail and quickly realized that this hike demands respect. Here are our best firsthand safety tips to help you stay safe, comfortable, and confident during your Rattlesnake Arches adventure.
Check the Weather and Road Conditions
Before you go, always check the forecast. Avoid hiking if rain is possible—the Black Ridge Access Road becomes impassable when wet, and flash floods can occur in low areas. The same goes for extreme heat. If the day looks dangerously hot, start at sunrise or postpone your trip.
Carry Plenty of Water
This cannot be overstated: there is no water anywhere along the trail. Pack at least one gallon (4 liters) per person, even in spring or fall. A hydration reservoir plus a backup water bottle is ideal.
In summer, double that amount and add electrolyte tablets or sports drinks to replace salt lost through sweat.
We hiked in April, and even then, the sun was intense. We were exhausted by the time we reached the last arch, and having extra water made all the difference.
Protect Yourself from the Sun
There’s little to no shade on this trail. Wear a wide-brimmed hat, UV-protective sunglasses, sunscreen, and lightweight long-sleeve clothing. Covering up may feel counterintuitive in the heat, but it keeps you cooler and prevents painful sunburns.
Know the Terrain
The path includes steep sections, slickrock slabs, loose sand, and uneven footing. Sturdy hiking boots with good traction are essential. Trekking poles are a big help for balance—especially on the steep descent into the Lower Arches Trail.
Bring Navigation Tools
There’s no cell signal for most of the hike, so don’t rely on your phone. Bring a paper map, a GPS device, or a GPS watch with the route preloaded. Trail signs are present but easy to miss, especially where the canyon floor blends with slickrock.
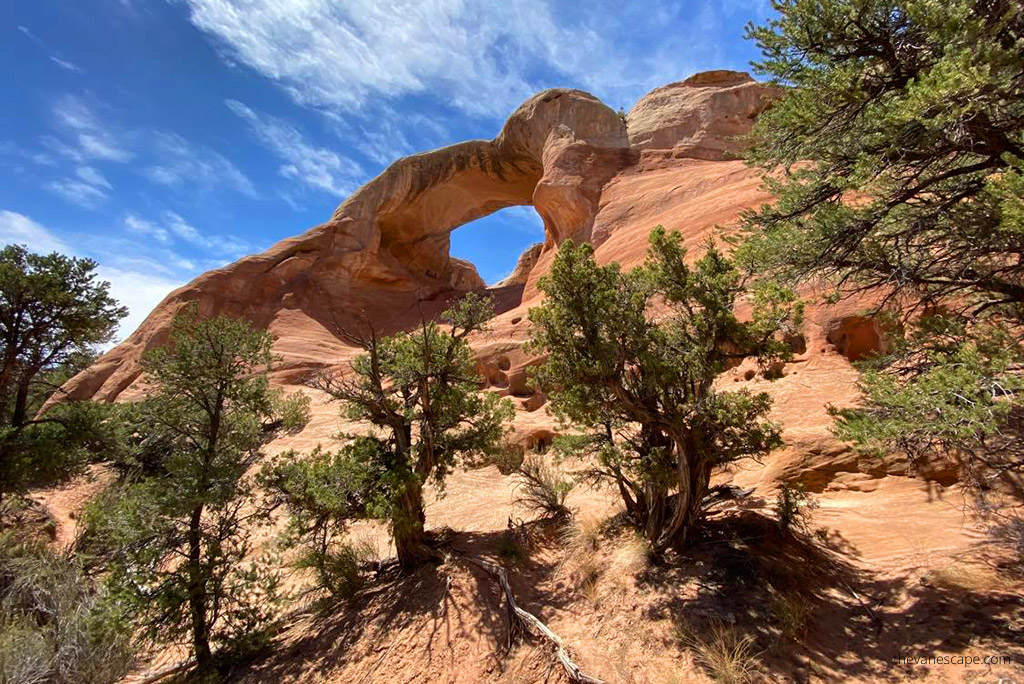
Watch for Wildlife
Despite its harsh conditions, the canyon is full of life. You may spot mule deer or bighorn sheep, and the area is home to snakes and lizards. Before sitting or stepping over rocks, check carefully where you place your hands and feet. Remember—this is Rattlesnake Canyon for a reason.
Pack Smart
Include these essentials in your daypack:
- Extra water and electrolytes
- High-energy snacks and protein bars
- A lightweight jacket for the cool return drive
- A first aid kit and insect repellent (gnats are common May–August)
- A headlamp or flashlight in case you return after sunset
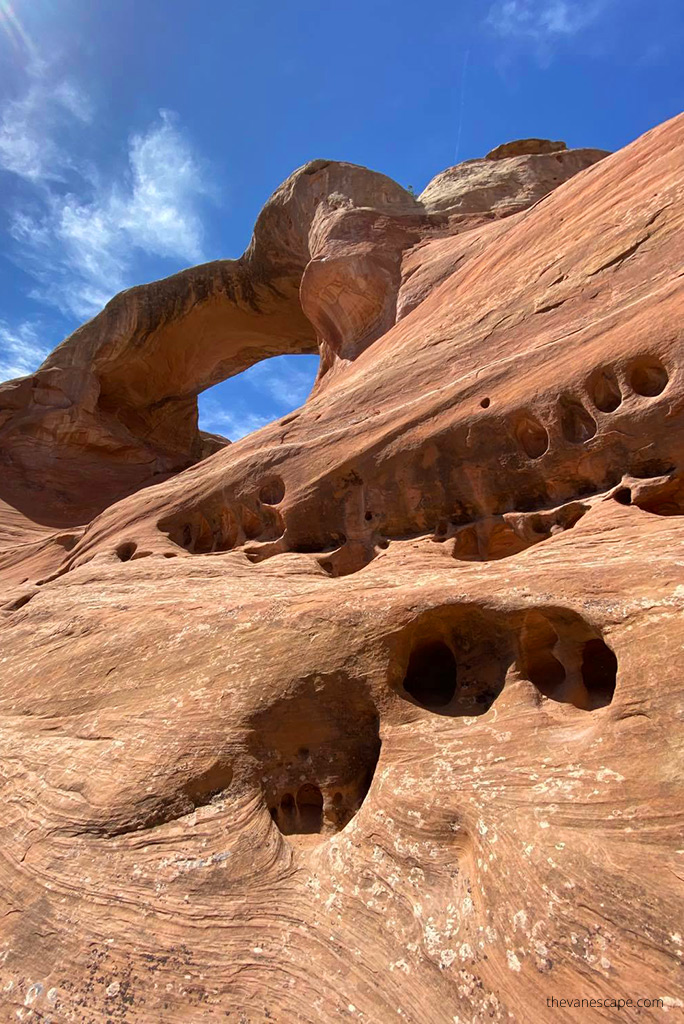


Know When to Turn Around
This is a challenging hike, even for experienced trekkers. Listen to your body, take breaks in shaded spots when possible, and don’t push past your limits. It’s better to return safely than to risk exhaustion or dehydration in such a remote area.
Respect the Wilderness
Stay on the marked trail and avoid climbing on or around the arches. The sandstone is fragile, and even light foot traffic can cause lasting damage. Pack out all your trash and leave no trace of your visit.
A hike through Rattlesnake Canyon is pure adventure—remote, silent, and unforgettable. With the right preparation, it’s also perfectly doable. Come prepared, start early, and give this desert landscape the respect it deserves, and it will reward you with one of Colorado’s most remarkable experiences.
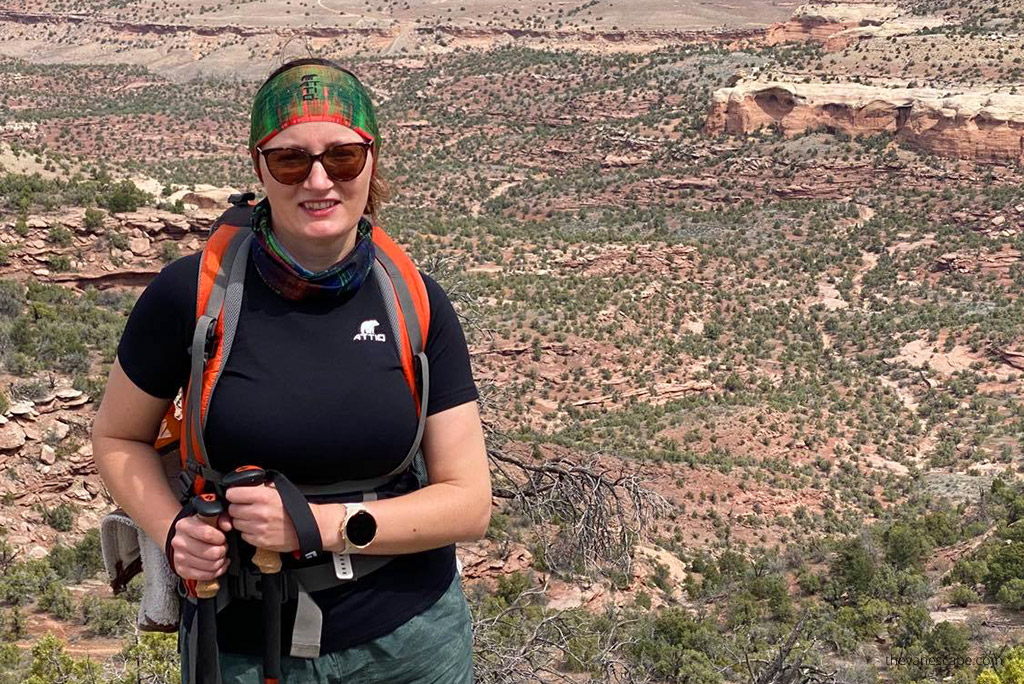
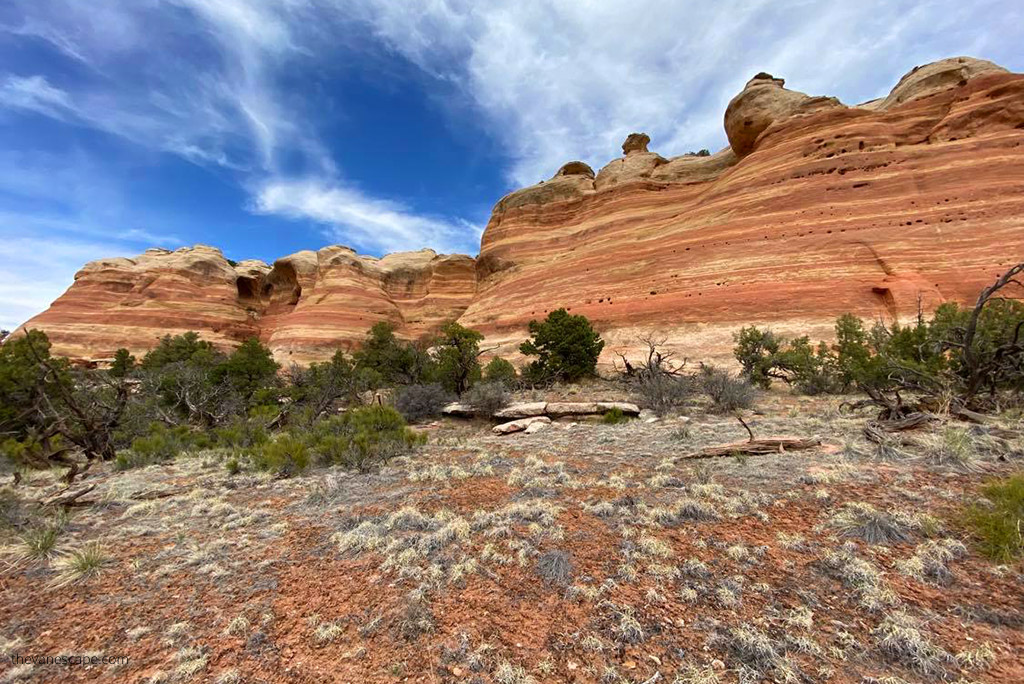
Camping in the Rattlesnake Canyon Arches Area
Spending a night near Rattlesnake Canyon can turn this remote hike into a true desert adventure—but you need to plan carefully. Camping in this area is limited and regulated to protect the fragile ecosystem of the Black Ridge Canyons Wilderness and the McInnis Canyons National Conservation Area.
Rules and Restrictions
Camping is not permitted within ¼ mile of the Rattlesnake Arches Trail or along the access road to the trailhead. The parking area is strictly for day use only, and overnight camping or vehicle stays are prohibited. Rangers patrol the area regularly, and violations can result in fines.
Your best options are outside the wilderness boundary. There are several designated dispersed camping areas and campgrounds around Fruita and Grand Junction that make great basecamps for this hike.
Best Places to Camp Nearby
- Jones Canyon and Knowles Canyon Backcountry Sites – Located within McInnis Canyons NCA but well outside the restricted Rattlesnake zone. A good choice for those looking for true backcountry solitude.
- Fruita BLM Campground (21 Road) – A small but scenic site managed by the Bureau of Land Management, about 30 minutes from the trailhead. Free or low-fee options, depending on the season.
- Colorado National Monument Campground (Saddlehorn Campground) – The most convenient established campground if you’re combining this hike with a visit to the Monument. Sites include picnic tables, restrooms, and sweeping canyon views.
- James M. Robb Colorado River State Park – Fruita Section – Ideal for road-trippers with RVs or those seeking showers, hookups, and easy access to Fruita’s restaurants and shops.


Backcountry Tips
If you’re backpacking into the Pollock Bench Trail route, dispersed camping is allowed in the surrounding McInnis Canyons NCA, but not within ¼ mile of the arches. Always follow Leave No Trace principles:
- Use existing campsites where possible.
- Pack out everything you bring in.
- Avoid building fires; use a camp stove instead.
- Leave rock formations, plants, and wildlife undisturbed.
Chris and I decided not to camp at Rattlesnake Canyon itself—the area is too fragile, and the hike is manageable as a long day trip—but we stayed nearby in Fruita, which made an ideal base for exploring both Rattlesnake Canyon and Colorado National Monument. Watching the sunset over the red cliffs from our campsite was the perfect ending to a long day in the desert.

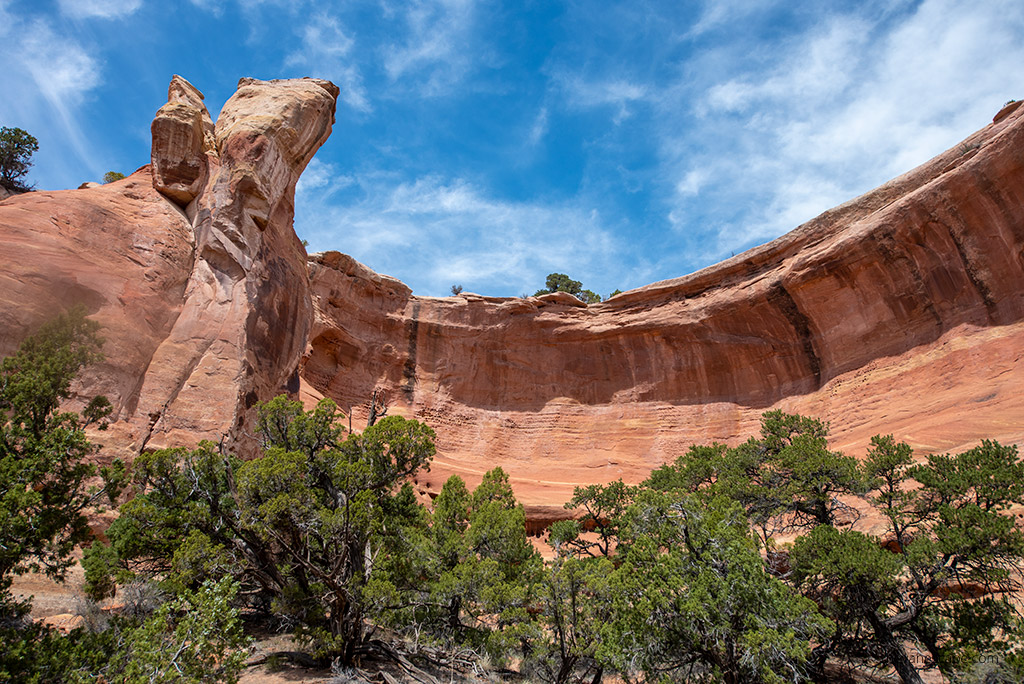
Final Thoughts
Hiking Rattlesnake Arches is one of those experiences that stays with you long after the dust has settled on your boots. It’s remote, wild, and undeniably beautiful—a reminder that some of Colorado’s greatest treasures still lie far from the crowds.
Chris and I discovered this incredible place during our two-week Colorado road trip, and it quickly became one of the highlights of our entire journey. Between the rough drive, the challenging trail, and the silence of the desert, it felt like pure adventure. Standing beneath Cedar Tree Arch with the canyon walls glowing orange in the afternoon sun was a moment we’ll never forget.
This is not a hike for everyone. It demands preparation, stamina, and respect for the wilderness. But for those willing to take the time and make the effort, Rattlesnake Canyon delivers something rare—solitude, wonder, and the humbling beauty of nature left untouched.
If you’re planning a road trip through western Colorado, add Rattlesnake Arches to your itinerary. It might test your endurance, but it will reward you with a view—and a feeling—you won’t find anywhere else.
Do You Like It? Pin It For Later!